
BIRD OF PARADISE/SVARGA DVIJASANA
I will load each week’s content below in the tabs. The most current week will show first in blue, but you’ll be able to click the boxes in grey beside the blue tab to view previous content.
If you’re like me, I have noticed my yoga practice has shifted a bit since practicing more at home…for the better. I find that when I take a pre-recorded class, I feel freedom to experiment more with the cues and even stop the video to work on something that resonates with me in the moment.
Don’t get me wrong, I miss the energy and sense of community in live classes, but a studio class isn’t necessarily tailored to what I want or need on any given day. So, there is something to be said for making time for both at-home and live classes when possible!
For your next at-home practice, I posted a 34-minute groove class that you can do on its own when you need something quick, or after another activity like riding or walking. Click here to be taken to my website, where you will find the video.
If you missed last week’s newsletter with a cue that will give you more “lift” in Bird of Paradise, and a tip that will help you find the bind without creating tension in your low back, click here. You can practice these cues with the 70-minute full-body flow from week 2, which is posted on my website. Try slowing down, or even pausing the video when you have opportunities during the class to practice the cues…you may be surprised how much more you get out of it when you allow your curiosity time to play.
Be well and enjoy the beautiful weather while we have it!
Once you are up in Bird of Paradise standing on your left foot with the right leg in the bind, press your right hamstring down on your right arm and press your right arm up into your hamstring. Then move to the left side with the left leg bound and give it a try!
Why?
By pressing your arm and leg into each other, you create a version of a lock. For many, this will offer not only more stability in the pose, but you’ll feel yourself lift up slightly towards better posture and, subsequently, a bigger breath. This is one of those cues that feels really good for my body. I think one of the reasons the cue works so well is that you can tailor the amount of pressure to get exactly what you need out of it.
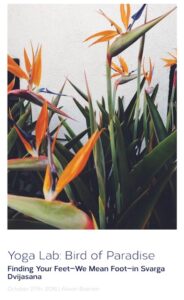
For some other good cues for Bird of Paradise, click on the image below for this week’s Favorite Find.
One inspiring tip:
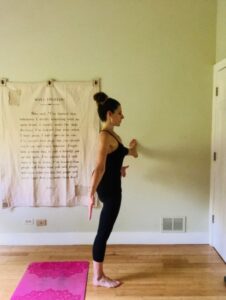
Stand with your left shoulder and hip facing a wall and your feet parallel to that wall.
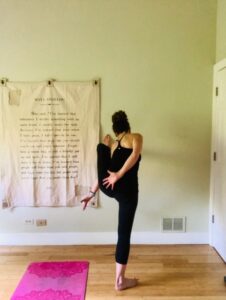
Place your left foot on the wall a little higher than hip height (see pic 1 – your left foot and hip will open/externally rotate). Then, begin building the bind by softening your lifted left knee and reaching your left arm under your left leg as you bring your right arm behind your back (see pic 2).
Notice your body will slowly rotate towards the wall as your hands come together and you find the bind (see pic 3). This version allows you to find the bind without beginning in a forward fold.
As I mentioned in Week 1, for some people the sequence of forward folding, binding, and then lifting up creates discomfort in the low back. This version helps take the pressure out of the lumbar spine.
One inspiring song:
“Fall at Your Feet” by Boy & Bear
One inspiring quote:
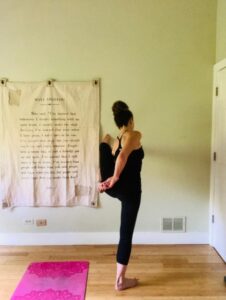
“Don’t wait for someone to bring you flowers. Plant your own garden and decorate your own soul.”
Namaste.
As you may know, Namaste means:
My soul honors your soul.
I honor the place in you where the entire universe resides.
I honor the light, love, truth, beauty, and peace within you, because it is also within me.
In sharing these things, we are united, we are the same, we are one.
During this historical and tumultuous time, I hope that more people can honor what Namaste stands for. We can begin by coming to our mats to move, breathe, and connect with our inner-selves. This week, I posted a 70-minute class that will move you through a full-body flow and prep you for Bird of Paradise. Click here to be taken to my website, where you will find the video.
If you missed last week’s newsletter with a cue that will help you lift into Bird of Paradise, and a tip that will help make lifting a little more steady, click here. The more you experiment with cues that make you stronger and more mobile, the more your practice will flourish.
As you lift up into Bird of Paradise with the right leg bound, consciously lift your right hip crease up as you root down into your left heel. Then, practice the same cue on the other side.
Note: this pose can be hard on the low back. If you have low back issues, work cautiously (or not at all) into the pose.
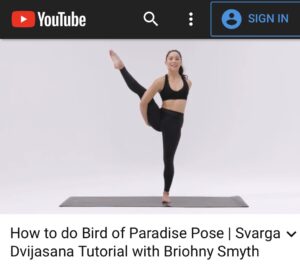
One Favorite Find for the week is a video that demonstrates the fundamentals of getting into the pose. If you need a reminder before reading on, click on the image below to watch on my website.
Why?
The cue above will activate the hip flexor of the lifted leg as well as the back of the standing leg to help take undue pressure out of the low back. You may be aware that when your low back/lumbar spine is flexed (rounded forward), and you add weight to it when lifting, the discs in the low back can be compromised. As you lift up into Bird of Paradise, the more you can use your core for support (hip flexor is part of the core) and the strength from the back of your standing leg (glutes and hamstrings), the less strain on your back.
As shown in the video above, you want to start in a forward fold with the standing knee bent to harness the full power of that leg. Your low back will be slightly rounded at this stage of the pose as well. Here you can check in for excessive rounding in the low back and, if that’s the case, work first on stretching your hamstrings to make sure you have the ability to hinge forward from your hip joint and not your low back.
If your hamstrings are tight, you run the risk of your pelvis tilting backwards, which can create excessive rounding in the low back and overstretch the ligaments and muscles there. Julie Gudmested is a physical therapist, has been teaching for 50 years, and has extensive training in specializing in chronic pain, orthpedeic problems, and sports injuries. She explains, “as you bend forward, more weight gets transferred to the front of the discs. With excessive force, the gel-like center of the disc can be pushed backward into the support ligaments, which can then bulge out.”
This is important knowledge for any forward fold. It is not meant to scare you, but rather educate you so you can make strides in your practice and teach from a place of knowledge. I always say we are built differently – some people never have back issues regardless of their alignment. But, since we don’t know who those people are, why not learn the absolute safest way to practice a forward fold?
If you want a quick anatomy brush-up on your low back, click here or on the image below to be taken to my website for a video and article on lumbar spine anatomy and possible sources of pain.
One inspiring tip:
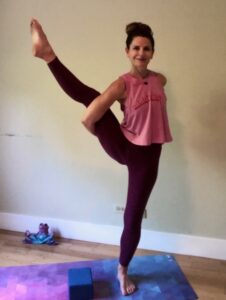
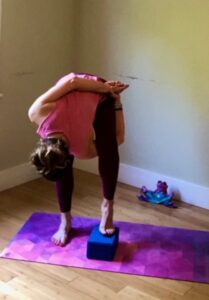
When coming into Bird of Paradise, place your right foot on a block as you take the bind (see picture below). Bend deeply into your standing knee, use cues from above, and lift off! As always, give this a try on both sides. I think you will find that having your foot on a block gives you a little bit of a head start and is helpful for those who may be a little tighter in the hips.
One inspiring song:
“Bitter Sweet Symphony” by London Grammar
One inspiring quote:
“Let us be grateful to people who make us happy; they are the charming gardeners who make our souls blossom.”
– Marcel Proust